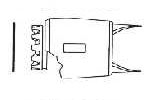
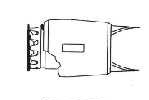
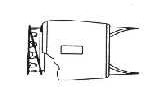
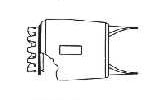
S&S Coupler Maintenance
Removing the Two Retaining Rings and the Coupling Nut
You must remove both retaining rings and the coupling nut to thoroughly clean and inspect a coupling. ALWAYS TAKE CARE TO PROTECT THE COUPLING TEETH!
1. Slide the coupling nut back to expose the FIRST retaining ring.

2. Hook the end of a small screw driver behind the outer coil under the finger on the ring and gently begin to pry it out of the groove. Use caution not to deform the ring by over-bending it.
3. Work the ring out of the groove and off of the lug, going gradually around the coupling lug. Do not over-bend the rings.
4. Push the SECOND ring toward the teeth with the nut, retract the nut and remove this ring in a like manner beginning again at Step 2. Note: Be careful not to push the second retaining ring back in the groove when hooking the finger to begin removing it, as it may get trapped under the coupling nut.
5. Remove the coupling nut when BOTH retaining rings are totally off of the lug. Note: It is always good to thoroughly clean the inside of the coupling when you have it disassembled.
Installing the coupling nut and the 2 retaining rings
Only install coupling nuts and BOTH retaining rings after the parts are thoroughly clean.
ALWAYS TAKE CARE TO PROTECT THE COUPLING TEETH!
1. Slide the clean replacement nut all the way onto the coupling lug with the threads out so the retaining ring groove is visible just beyond the edge of the coupling nut.
2. Install the FIRST stainless steel retaining ring by carefully spreading one end of the ring away from the others and hooking it in the groove.
3. Wrap the rest of the ring into the groove by gently expanding it, coiling it over the teeth and into the groove. Do not bend the ring so far that it is permanently deformed.
4. Check the seating of the ring by sliding the coupling nut over the ring. If it moves smoothly, the ring is properly seated. If it does not, the ring must be re-seated before use.
Re-seating can be done by sliding the ring back and forth using the nut and a screw driver.
* Removal, inspection, cleaning of debris from the ring and groove, and/or replacement of a bent or sprung ring may be necessary.
Re-seating can be done by sliding the ring back and forth using the nut and a screw driver.
* Removal, inspection, cleaning of debris from the ring and groove, and/or replacement of a bent or sprung ring may be necessary.
5. If the ring is seated properly, push it to the back edge of the groove to make room for the second ring.
6. Install and check the seating of the SECOND ring following the same procedures as above, beginning with Step 2.